I sometimes use affiliate links in content. This doesn’t cost you anything but I may make a commission payment from anything you buy through these links. As an Amazon Associate I earn from qualifying purchases. All opinions remain my own.
There is something deeply comforting about a massage oil on a cold evening. The scent of orange and spice, the slow rub of your hands, the cosy feeling that follows. The trouble is the bottle. It tips in your bag, leaves oily marks on the sheets, and always seems to run out when you need it most.
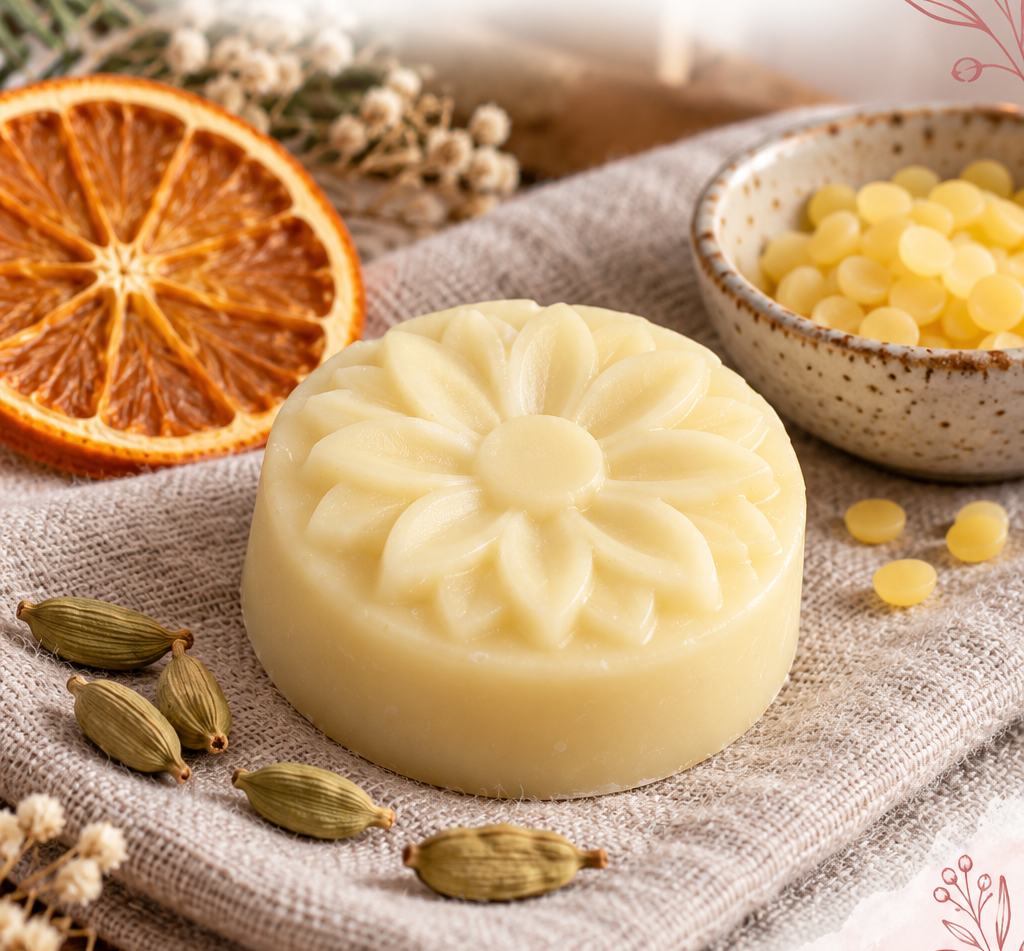
A solid massage bar fixes all of that. It is a small block of beeswax, butter and oil that stays firm in your hand, then melts into a silky layer as soon as it touches warm skin. No spills, no mess, and it travels beautifully.
This recipe is written for complete beginners. You need three base ingredients, four essential oils and about 30 minutes. I will also walk you through the part most recipes rush past: how much essential oil is safe to use on skin.
Table of Contents
🧈 Why Choose a Solid Massage Bar?
Liquid oils are lovely, but they are awkward. A bar solves the everyday annoyances.
- It will not spill, so it is easy to pack for trips or tuck into a gym bag
- It melts on contact with your skin, so you control how much you use
- It glides evenly, with less slipping than a runny oil
- It makes a thoughtful handmade gift
If you already enjoy blending oils for massage, you may have seen our guide to the best massage essential oils. That post covers which oils to choose. This one shows you how to turn them into a finished product.
🍊 The Cosy Winter Blend
Winter blends often lean on spice, and spice is where people go wrong. Some of the most popular “warming” oils are also the most irritating on skin when overused.
This blend keeps the cosy, spiced character while staying gentle:
- Sweet orange: bright, sweet and familiar. It forms the friendly top note. Our orange essential oil guide covers its profile in more detail
- Ginger: a spicy, slightly woody aroma that feels like a hot drink on a frosty day. You can read more in our ginger essential oil profile
- Black pepper: a dry, peppery note that adds depth in tiny amounts
- Cardamom: sweet, spicy and a little herbal. See our cardamom essential oil guide
Notice what is missing. There is no cinnamon bark and no clove. Both are known skin irritants and do not belong in a leave-on product. If you love that scent, enjoy it in a diffuser or a simmer pot instead.
A quick note on the word “warming”. The oils do not literally heat your skin or treat your muscles. The feeling comes from the aroma, the gentle pressure of your hands and the ritual of slowing down. Think of it as a sensory treat rather than a remedy.
📏 Get the Safety Right First
Essential oils are highly concentrated. A little goes a very long way, and more is never better.
For a leave-on body product like this, I use a dilution of about 1 to 2 percent. In this recipe the finished bar sits at roughly 1.5 percent. That keeps the scent noticeable without overloading your skin.
Here is what that means in practice:
- A 90 g bar at 1.5 percent contains about 1.4 g of essential oil in total
- Weigh the oils on a small digital scale (0.01 g accuracy) rather than counting drops, because drop sizes vary between bottles
- Never add extra oil “just in case”
Please do a patch test. Rub a small amount of the finished bar on your inner forearm and wait 24 hours. If you notice redness, itching or discomfort, wash it off and do not use the bar.
Skip this recipe, or speak to your doctor first, if any of these apply:
- You are pregnant or breastfeeding
- You are making it for a child
- You have broken, sunburnt or very sensitive skin
- You have a known allergy to any ingredient
- You live with pets who may lick your skin or sit on your lap while you wear it
Our guide to applying essential oils safely is worth a read if you are new to topical use.
🧪 Essential Oils vs Infused Oils
This distinction trips up many beginners, so it is worth pausing on.
An essential oil is a concentrated aromatic extract, usually steam distilled or cold pressed from a plant. You use it in drops, or in this case fractions of a gram.
An infused oil is a carrier oil, such as olive or sunflower, that has had herbs steeped in it. It is mild and used in much larger amounts. It is not interchangeable with an essential oil.
So a “ginger infused oil” is not a substitute for ginger essential oil in this recipe, and the dilution rules above only apply to true essential oils. If you want to understand carrier oils better, our carrier oils guide explains the options.
🛒 What You Will Need
This recipe makes one 90 g bar, or two smaller 45 g bars. All measurements are in grams and Celsius.
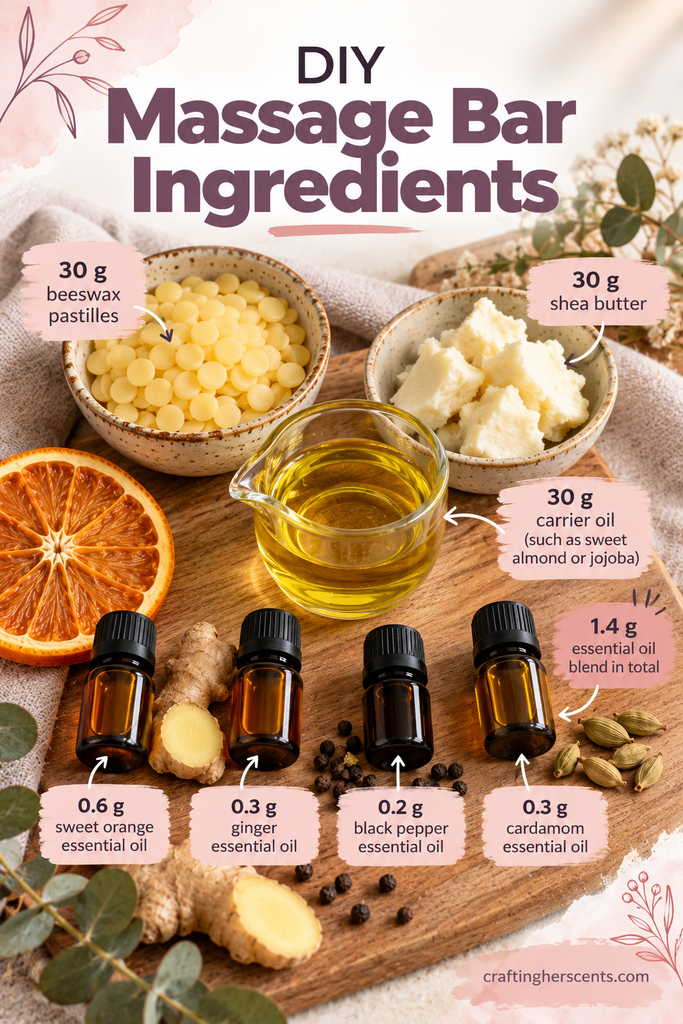
Base ingredients
- 30 g beeswax pastilles
- 30 g shea butter (cocoa butter also works)
- 30 g carrier oil, such as sweet almond or jojoba oil
Essential oils (1.4 g total)
- 0.6 g sweet orange essential oil
- 0.3 g ginger essential oil
- 0.2 g black pepper essential oil
- 0.3 g cardamom essential oil
Equipment
- A heatproof jug or glass bowl
- A saucepan for a gentle water bath
- A digital scale with 0.01 g accuracy
- A silicone mould, or a clean lined tin
- A small spoon or silicone spatula for stirring
If you have a nut allergy, choose jojoba or fractionated coconut oil rather than almond, and always check labels.
🌱 Vegan Swap
Beeswax can be replaced with candelilla wax. As a general rule, use about half the weight, so 15 g of candelilla for every 30 g of beeswax. It is a harder wax, so too much will make the bar stiff and chalky. If it feels too firm, remake it with slightly less wax.
🔥 How to Make Your Massage Bar
The whole process takes around 30 minutes, plus setting time.
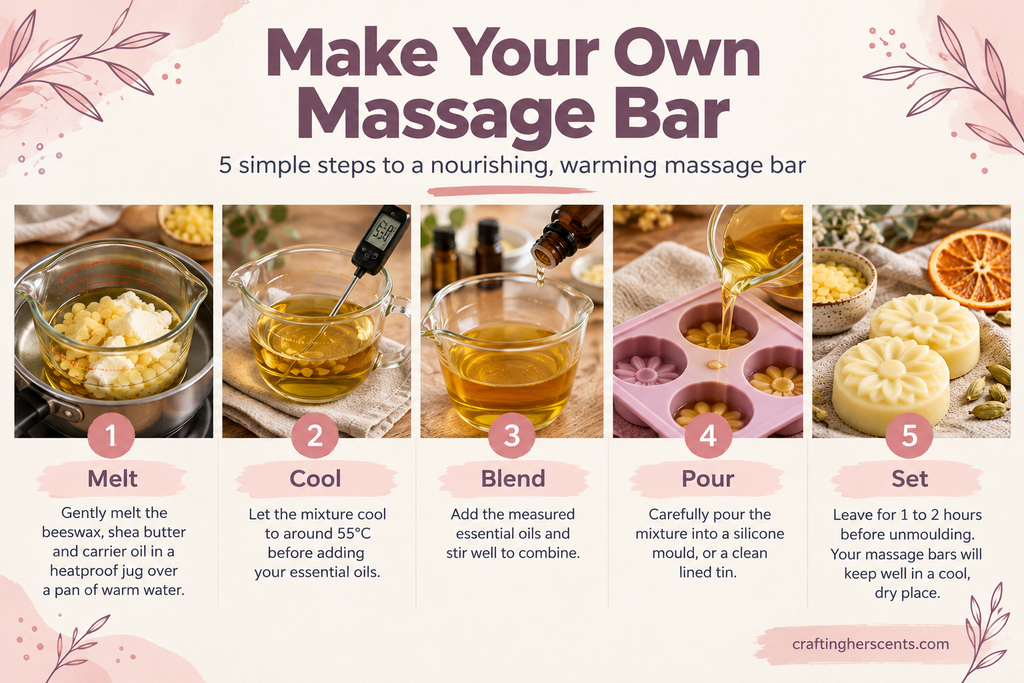
- Prepare your mould. Place it on a flat tray so it is easy to move without spilling.
- Weigh the base. Add the beeswax, shea butter and carrier oil to your heatproof jug.
- Melt gently. Set the jug in a saucepan with a few centimetres of simmering water. Stir now and then until everything is completely liquid. Beeswax melts at around 62 to 64 degrees Celsius, so keep the heat low and steady.
- Cool slightly. Remove the jug and let it sit for a few minutes. You want it to cool to roughly 55 degrees Celsius before adding your oils. Hot wax can drive off the delicate aroma.
- Add the essential oils. Weigh in each oil, then stir well for a full minute so the scent is evenly mixed.
- Pour quickly. Fill the mould right away, before the mixture starts to thicken.
- Let it set. Leave the bar somewhere cool for one to two hours. Do not put it in the freezer, as rapid chilling can cause cracks.
- Unmould. Once it is fully firm, gently pop it out. Wait until it is completely set before packing it away.
Keep a note of your measurements. If you love the result, you can scale the recipe up for gifts without guesswork.
💆 How to Use Your Bar
Hold the bar in your warm hands for a few seconds, or rub it directly over your shoulders, arms or legs. The surface softens and leaves a thin, silky layer.
Avoid your face, eyes and any broken skin. Wash your hands after use, particularly before touching your eyes.
Use light, slow strokes and take your time. Part of the benefit is simply carving out a few quiet minutes for yourself.
📦 Storage and Shelf Life
Because this recipe contains no water, it does not need a preservative. That makes it one of the easiest body products for beginners.
- Store the bar in a tin, a small jar or a wrapped piece of baking paper
- Keep it out of direct sunlight and away from radiators and hot cars
- Keep it dry, and always use clean, dry hands
- Label it with the date and the blend
Expect a shelf life of around six to twelve months, depending on how fresh your carrier oil was. If it smells sharp, rancid or “off”, throw it away. Our guide to the shelf life of essential oils explains why oils change with age and how to store them properly.
✨ Troubleshooting Your First Batch
- The bar is too hard. Remake it with a little less wax or a little more carrier oil
- The bar is too soft or greasy. Add a touch more wax next time
- The bar looks grainy. The butter cooled too slowly. Cool the mould in a slightly colder spot
- The scent is faint. Resist the urge to add more oil. Let the bar cure for a day or two, as the aroma often develops
- The bar sweats beads of oil. It has probably been stored somewhere too warm
🎁 Make It Part of Your Winter Routine
Once you have the basic method, you can build a small collection of seasonal bars. If you enjoy cosy scents, our guide to winter essential oils is full of ideas for the colder months. For blending theory, the guide on how to mix essential oils will help you build your own combinations with confidence.
Wrapped in baking paper and tied with string, a massage bar makes a lovely handmade gift. Add a small label listing the ingredients, so the recipient can check for allergies.
Make a small batch first, test it and enjoy it. A cosy, spill-free massage bar is one of the most satisfying winter projects you can make, and it takes less time than a cup of tea to get started.